

Sometimes when I’m bored I watch YouTube videos. While I was binging art tutorials I came across these videos on Gelli Printing. I have heard about this art form but never looked into it. When I was in college, I took a lithography course. In lithography, the artist will transfer an image onto a large stone. An etching solution is used, ink is placed on the stone and the image is pressed. This method allows the artist to make multiple prints using one image. I then went on to take a course in printmaking. In this course, we learned how to create linocut printing (linoleum) and metal etchings. I learned how to use a printing press and how to register an image for multi-color printing and lots of amazing techniques. I thought to myself this could be something fun to try. YUP, I’m hooked! This type of printmaking has my trifecta: simple set up, easy to make/create, easy to clean up. What more can you ask for? Did I mention you can do this with your kids? (Older kids like 5th grade on up.)
As I mentioned before, the supplies are relatively inexpensive. Here’s what you need to get started:
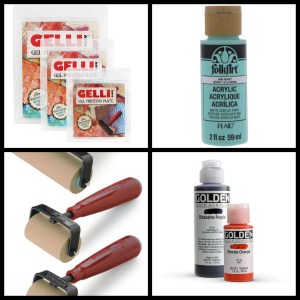
- Gelli Pate: whatever size you want (5×5, 6×6, 3×5, 5×7 etc.)
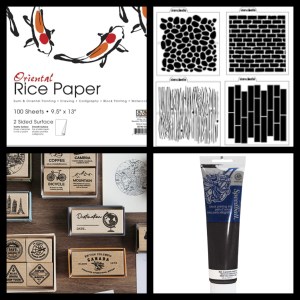
- Paper: Copy paper, rice paper (my favorite), or paper of your choice
- Brayers: They come in different lengths, 2″,3″, 4″, 6″
- Acrylic Paint: This can be as cheap as the craft paint you get at Walmart (Folk art) to as expensive as Golden. They both work!
- Block Printing Ink: I got black ink, mostly for transferring images from magazines and laser printer photocopies.
- Stencils: for adding texture to your print. You can use everyday items too, sky’s the limit
- Rubberstamps: You can use to take away paint for an image or ink/paint stamp to layer an image.
- Magazines: to transfer text and or images to your print
The idea of using a Gelli plate is to use acrylic paint as layers to embed textures and images. This is a monoprint. No two prints are alike. Of course, there are exceptions to the rule. You can try to register your paper and print a second or third print. You can also use the ink transfer to pull multiple prints of one image. Prints can be used in collage, mixed media, journals, just about anything you can come up with.
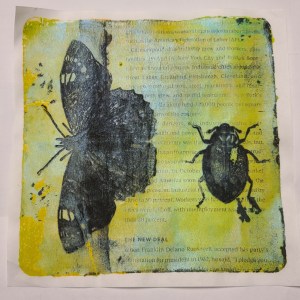
When I was watching these videos, I thought that the artists were using black acrylic paint to transfer magazine images and photocopies. I kept trying and fail after fail after fail I was like ‘What am I doing wrong?’ I might have gotten a faint image but it was nothing like what I was seeing in these videos. Then the AH-HA moment happened! INK. I tried again using a thin layer block printing ink. OMG! I got an image to transfer! It was amazing. The next step is to let that ink dry completely. COMPLETELY. If you don’t, you’ll smudge the image with the next layer of paint. I learned that the hard way.
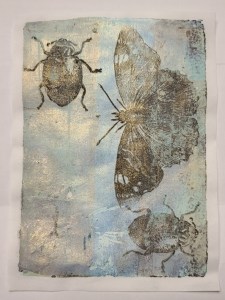
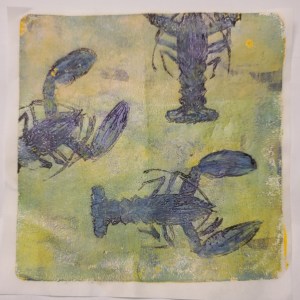

After your ink layer has dried it’s time for another layer. Using a brayer, apply a thin layer of acrylic paint over the Gelli plate. While it is still wet you can add texture stencils and rubber stamps to lift the paint off the plate. Let each layer dry before applying the next layer. For the last layer, brayer a thin layer of acrylic paint on the block. Take your paper and place it on top of the block. Gently use pressure over the paper. You can use your brayer, a barren, or even place a heavy book on top. Remember that the top layer of paint will be the background color of your image. It may be confusing at first but once you make a few prints you’ll see what I’m talking about. This process is as close to “instant gratification” as it gets, and I’m down with that. Anything that holds my attention gets a thumbs up! Did I mention that they are cool? Seriously this printmaking technique is pure joy.
What do you do with Gelli prints? Artists use them in decoupage, to make ATCs (Artist Trading Cards), decorating journals, making art journals, cards, making books, or framed art. Ooo, maybe you can make a larger print and use it as wrapping paper! The possibilities are endless. I know that Gelli printing has given my old wood-mount rubber stamps a new life. I highly recommend you give this a go! Not only is it satisfying, but the end result is rather quick. Did I mention it’s fun?!
If you have any questions or comments, please feel free to drop me a line. Thank you kindly for liking and subscribing.
Artfully yours,
Andi
