
A reader asked me about getting more information on Colored Pencils. They also suggested I make a tutorial video. Well, it’s been a hot minute but I have done it! Finally, a tutorial I deem ready to view. Let me say this, after a zillion takes, reshoots, and countless hours of editing, I made a little tutorial on… “The Super Condensed, Most Definitive Guide to Colored Pencils.”
In the tutorial, I am drawing an avocado which I divided in half. The left side will be rendered in Crayola Colored Pencils and the right, Faber-Castell Polychromos Colored Pencils. I wanted to show regardless of the price-point of your material, using the Elements of Art, and Colored Pencil Techniques, you can achieve a flawless image. I used similar hues for both types of pencils. For the Crayola Colored Pencils, the colors used are Golden Yellow, Mango, Palm Leaf, Fern, Pine Green, Navy, and Black. The Faber-Castell Polychromos Colored Pencils, the colors used are Dark Cadmium Yellow, Orange Glaze, May Green, Leaf Green, Deep Cobalt Green, Prussian Blue, Walnut Brown, Black.
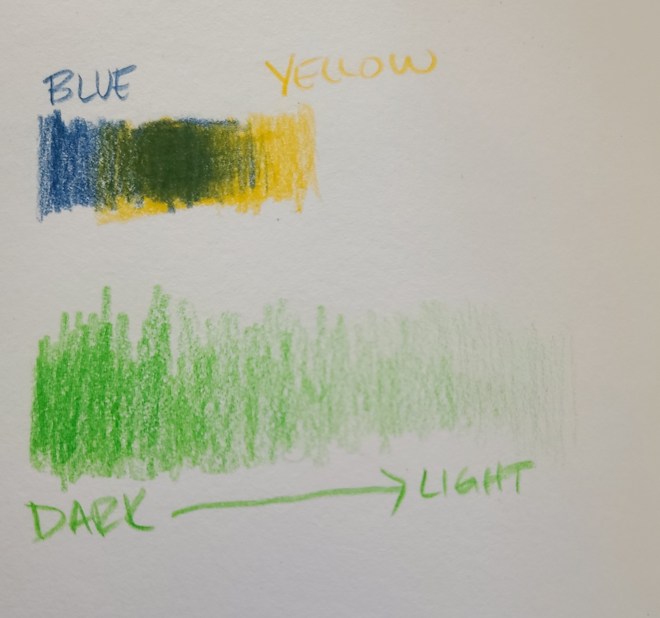
Colored pencils are a medium where building layers are key. When layering colored pencils start by using light pressure. Not sure how to do this? Let’s make a swatch from dark to light. Start by rubbing the pencil back and forth on the paper to build up the darkest value, as you move your hand to the right begin to use a little less pressure on the pencil thus gradually becoming lighter. This warm-up exercise is great because it allows you to become familiar with the medium. Much like graphite pencils where there’re soft leads and hard leads, colored pencils have cores that can be either hard or soft, depending on what they are made of, so learning how your pencils work is important. To practice blending two colors together, try using two primary colors. For example, use blue on the left and yellow on the right. As the two colors meet in the middle you should have a green.

Burnishing is a technique that uses heavy pressure on the pencil while covering the paper so that none of the fibers show through. Essentially it’s making a solid color with no paper showing through. If you are using wax-based pencils, you will see a glossy sheen on top of the burnished area. In the video, I also mention the Elements of Art. The Elements of Art are Line, Texture, Shape, Form, Color, Space, and Value. Lines can be used to create Texture and Value, Color and Value, and can define Shape and Space. Keeping these in mind I give the avocado its shape, define the space, and use color to create texture.
Blending is another technique used with colored pencils. One type of blending is layering colors. You can use a blending stick to rub the colors and smooth them out. Another trick is the use of Gamsol. Gamsol is a mineral spirit found in most art supply stores. To use, dip your blending stick into the bottle (just the tip…), and using a circular motion, blend the area desired. If you can’t get ahold of Gamsol, don’t worry, J&J Baby Oil works well too. (Starving Artist Hack!)
Finally, I finish up the drawing sample and then I show a finished version of the avocado in the last frame. Colored pencils are fun to work with. It’s a great medium for drawing portraits, landscapes, cartoons, anime, abstract, and practically anything. Colored pencils can be soft and pastel-like or bold and vivid like oil paint. This medium is very versatile. So, go grab those pencils and get to it, creativity is calling. If you have any questions or comments, leave me a note. Thank you very much for liking and subscribing to my blog.
Artfully yours,
Andi
And now for the show…

great video! Continue expanding your horizons. Love Dad
LikeLike