
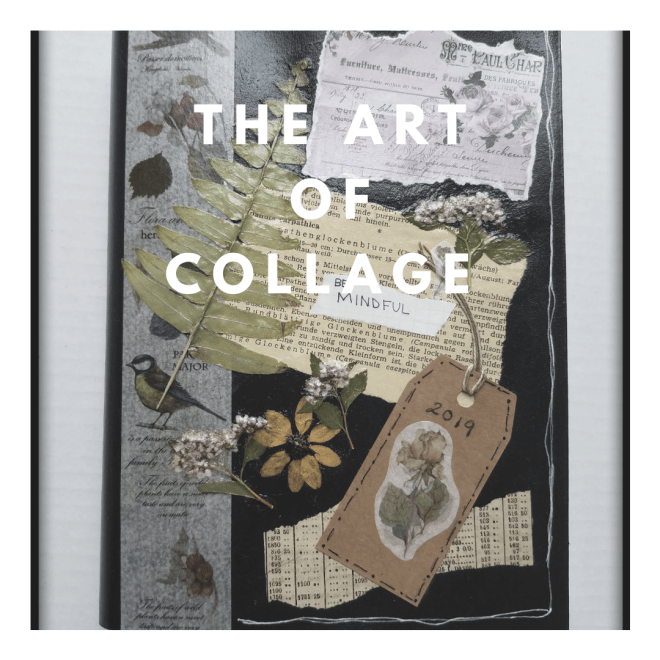
Collage is an old art form stemming back to the early 1900’s. It may seem simple, but the use of all the elements and principals of art are needed to make these beautiful compositions. Gluing pieces of paper and creating compositions is the easiest way to explain how collage is made. This sounds simple but every piece of paper, photo, or object is meticulously placed in a composition until the Artist feels the work is finished.
What can you make with collage? Practically anything! I thought we’d try a simple project that can be completed in a day… without further ado, let’s get to it!
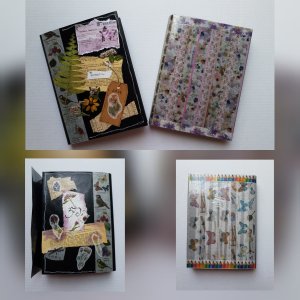
BOOK COVERS! Yeah with back to school on its way, why not decorate the heck out of
those books. I just made a book cover for my bullet journal. I have a NUUNA and although it has a soft leather cover, I feel that it needs to be protected. I remember my Mother bringing home brown paper bags from the grocery store. We would clear off the table and cut the bags open. We placed the books on the sheets of craft paper bags and wrapped the books. I must say they were very durable.
The supplies are simple: Various papers, images, and Glue. Now if you want to get crazy, get your pens, markers, pressed flowers, ephemera, stamps, whatever is 2-dimensional that can be glued down. I personally use Mod Podge, it works really well. I also use whatever I have on hand to collage with. It’s all part of the fun.
For making a book cover, measure cover to cover and add an additional two to three inches for the inside flaps. If you want a more secure pocket for the inside flap there is some folding involved. Next, gather all of your materials. Lay them out on top of the cover. Keep rearranging them until you are pleased with the composition. This is for you, so use materials and colors that make you happy. Once you are satisfied with your composition, it is time to glue them in place.
You can use any white glue. But, there are a million brands out there and depending on its uses you may want a glue that is acid-free, non-yellowing etc. Like I said, I use Mod Podge but Elmers works just as well. Glue the back of the item first, then give it a light coat on top to secure it in place. If there are multiple layers of paper, let each layer dry before adding more to it. Depending on the paper you are using, getting it too wet with water or glue will lead to tearing.
Once the project is dry, make your fold lines and place it around your book. I wanted to reinforce my collage so on my first attempt I used washi tape and then I used packing tape to seal up the paper. This made for a sturdy book cover. On my next project, I used Super Glossy Mod Podge for the front of the collage and then on the back I used a piece of clear vinyl. I am pleased with both outcomes and since they are so easy to make and it is a rather quick project, I can make more and change them out!
One last thing, I am not sponsored in any way, and the materials I use I only suggest because I have had success with them. If you have any favorite materials you use please leave a comment and do also share any of your techniques or projects! Please like and share and as always try to find time to be creative.
Artfully yours,
Andi
,,
